Why most beginners lose in the first month
The market doesn’t take your money. Your own entries do. After 8 years on an FX trading desk, I’ve watched retail traders make the same three mistakes: entering too early, sizing too large, and quitting the demo before they’re ready.
This guide skips the theory. You’ll get the exact steps I’d give someone walking into a trading desk for the first time, broken down into actions you can take today.
What is forex trading
Forex (foreign exchange) is the market where currencies are bought and sold. When you trade EUR/USD, you’re buying euros and selling dollars, or the opposite. The forex market runs 24 hours a day, five days a week, with $7.5 trillion in daily volume (Bank for International Settlements, 2022 triennial survey).
You don’t exchange physical cash. You trade contracts where profit and loss come from price movements in currency pairs. Most retail traders access this market through a broker offering CFDs or spot FX.
Step 1: Choose a regulated broker
Your broker controls your money. Choosing the wrong one is the most expensive mistake a beginner makes.
Three things matter: regulation, spreads, and minimum deposit.
Regulation: Look for FCA (UK), CySEC (EU), or ASIC (Australia). These regulators require brokers to keep client funds in segregated accounts. Unregulated brokers can freeze withdrawals. They do. Our forex broker regulation guide explains the full tier system and how to verify any license in two minutes before you deposit.
Spreads: The spread is what you pay per trade. EUR/USD around 0.7 pips on a standard retail account is a fair rate for a beginner. I run my own raw-spread account at near-zero pips plus a small commission per lot; for beginners, a standard-spread account is simpler. No commission math to track on every trade.
Minimum deposit: Many regulated brokers let you start from as little as $1, though a small starting deposit in the low three figures is the practical minimum for real position sizing. A slightly larger starting capital gives better flexibility. On that kind of account you can trade 0.02 lots on major pairs at 2% risk per trade, which is the standard risk unit on most professional desks.
Step 2: Open a demo account first
Don’t skip the demo. Anyone who says demo trading is useless is selling you something.
Demo accounts use real market data and real execution speed. They fail to replicate one thing: your emotional response to real losses. But your first goal isn’t emotional control. It’s learning platform mechanics and proving a basic strategy works.
Spend two to four weeks on demo. Track every trade in a spreadsheet: entry price, stop loss, take profit, result, and your reasoning at entry. That log is worth more than any paid course. If you’re learning the vocabulary from scratch, our roundup of the best trading courses for beginners covers the free and paid options that teach pip math, position sizing, and order types in the order that actually works for new traders.
When your demo win rate is consistently above 50% over 20+ trades, move to a small live account.
Step 3: Learn to read a currency pair
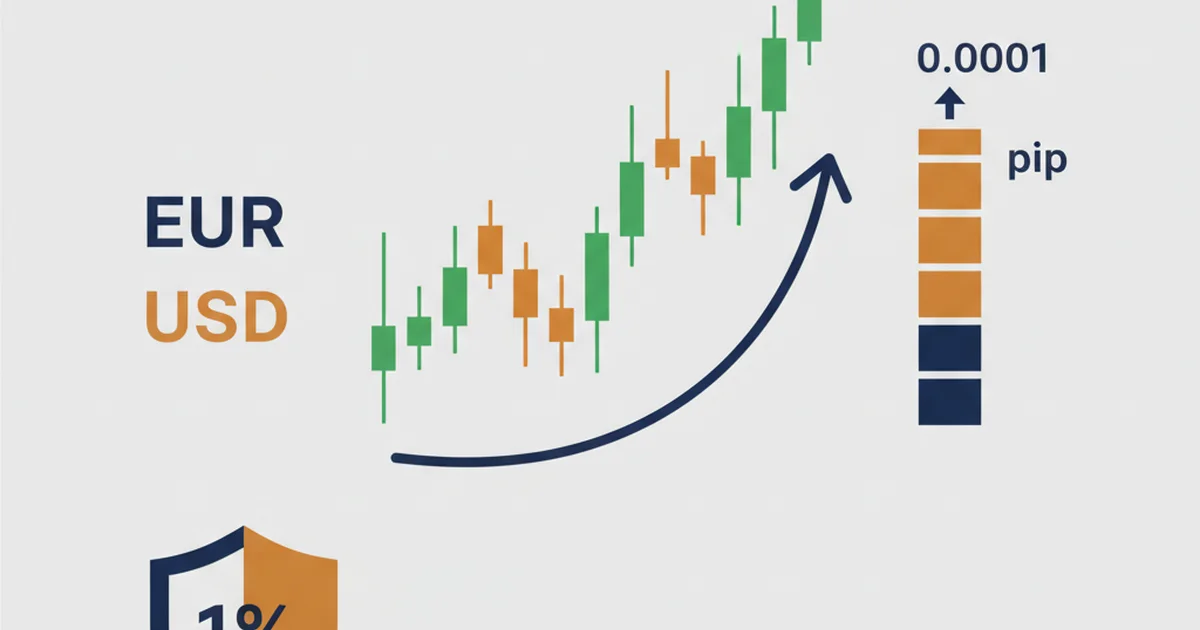
Every forex trade involves two currencies. EUR/USD means euros traded against US dollars.
- Base currency: The first one (EUR). This is what you’re buying or selling.
- Quote currency: The second one (USD). This is what you pay with.
- Pip: The smallest standard price move. For EUR/USD, one pip = 0.0001. Moving from 1.0800 to 1.0850 is 50 pips.
- Spread: The gap between the buy price and sell price. You pay this on every trade entry.
On a typical retail standard account, EUR/USD spread during London session runs 0.9 to 1.3 pips in normal conditions. It widens during major news releases. Always check the economic calendar before entering a trade.
Step 4: Read a basic chart
Candlestick charts are the standard. Each candle shows four prices: open, high, low, close. A green candle means price closed higher than it opened. Red means the opposite.
Start with the daily (1D) and 4-hour (4H) charts. These timeframes filter out most short-term noise that triggers bad entries. The chart patterns guide covers the formations worth knowing. Before memorizing patterns, focus on identifying support and resistance levels, horizontal price zones where price has reversed before.
Step 5: Pick one simple strategy
Beginners who try five strategies at once master zero. Start with something you can explain in two sentences.
A moving average trend-follow works for most beginners: find a pair trending on the daily chart, enter a pullback to the 50-period EMA on the 4H chart, stop below the last swing low, take profit at 1.5x to 2x the stop distance. The MACD indicator guide shows how to add a momentum filter to time entries better.
One thing I’ve seen beginners miss: they follow a strategy but never check the win rate math. The “9:30 NY open reversal” pattern, popular on trading forums, has roughly a 55% hit rate. That’s not an edge. It’s a coin flip with extra steps. A strategy needs a 60%+ win rate with positive risk-reward before it’s worth real capital.
Test your strategy on 20 demo trades first. Only then go live.
Step 6: Risk management before you trade live
Never risk more than 1-2% of your account on a single trade.
On a small starting account, 2% risk is just a few dollars per trade. Small, yes. That is the point. You are building a track record, not getting rich in a month.
On a slightly larger starting account, 2% might be a few dozen dollars per trade, allowing 0.02 lots on major pairs. That’s enough to generate meaningful data without a bad week wiping you out.
Before every trade: write down your stop loss price and calculate the dollar risk. If you haven’t done that calculation, you’re guessing.
One more step: check the calendar. EUR/USD behaves differently in the 24 hours before an ECB interest rate decision. Spreads widen, volatility spikes, stop hunts are more common. On the FX desk, we’d cut position size in half as a default on ECB days. Retail traders rarely adjust for this. The forex trading for beginners guide covers position sizing formulas in detail.
Step 7: Place your first live trade
You’ve chosen a broker, practiced on demo, and have a strategy with a tested win rate. Go live. Start small.
Deposit a small starting amount you can afford to lose. Open one trade. Use 0.01 lots. Your maximum possible loss on a 20-pip stop is just a couple of dollars.
The first live trade always feels different from demo. That’s normal. The platform works the same. The market doesn’t care about your account size.
What matters: follow the same entry rules from demo. If you’d reject the trade there, reject it live. When you start making exceptions because a move “looks strong,” discipline breaks. Record the result and move to the next setup.
Common mistakes that kill beginner accounts
Trading without a stop loss. A hard stop in the platform, not a mental one. The most common account-killer: retail traders watching positions instead of placing stops, then freezing when price moves against them.
Overtrading the news. NFP, CPI, and central bank decisions cause sharp, unpredictable moves. Your 0.01 lot position can survive the spike. Your strategy’s logic usually can’t. Stay flat during major news or accept you’re speculating, not trading.
Moving the stop loss. You set a stop at 1.0750. Price approaches 1.0760 and you move it to 1.0720 to “give it room.” You just invalidated your risk calculation. The original stop marked where your trade idea was wrong. Moving it is denial.
Switching strategies after three losing trades. Three losses in a row doesn’t mean your strategy is broken. It might be normal variance. Check your win rate over 20+ trades. If it’s below 45%, then investigate. Not after three.
The traders who lasted on the professional side were predictable: same strategy, same risk size, same entry rules, every session. No heroics.
FAQ
How much money do I need to start forex trading?
How long does it take to become profitable in forex?
What currency pair should a beginner start with?
Is forex trading risky for beginners?
Do I need to watch charts all day to trade forex?
What is a pip and how does it affect my profit?
🌍 Our recommended brokers
Reader Reviews
The $600 account sizing math finally made sense after this article. I had been trading 0.1 lots on a $400 account, essentially risking 6-7% per trade without realizing it. Switched to 0.01 lots with a hard 2% rule, rebuilt my log from scratch over 30 trades on EUR/USD 4H, and went from a string of blown setups to my first month finishing positive. The formula is not complicated but I needed someone to state it without the motivational padding.
The demo trade log advice changed everything. I had been using demo accounts for months without tracking a single entry. Two weeks of logging entry, stop, target, and result showed me I was taking setups 30 minutes before major news releases and losing 70% of them.
The spread math on EUR/USD was the specific detail I needed. My previous broker was showing 0.0 pips but charging $7 commission per standard lot, total cost 0.7 pips - same as Exness Standard. Knowing the correct comparison method meant I stopped chasing zero-spread marketing. Opened an Exness Standard account based on the regulation check in Step 1 and withdrawal has been instant both times I tested it.
The opening section about three mistakes beginners make is accurate in a way that most trading content avoids. I entered too early, sized too large, and quit demo after one week. Did all three in the first two months. The part about entering too early hit directly - I was chasing breakouts instead of waiting for pullbacks. Once I started waiting for the 4H candle to close and confirm direction, my entries on GBP/USD improved measurably over the next 20 trades. Not profitable yet, but the entries are structured rather than reactive.
The warning about moving stop losses is the one I needed printed somewhere visible. I moved a stop on a losing EUR/USD trade three times last month, turned a $4 loss into a $22 loss on a $200 account. After reading the exact explanation of why the original stop marks where the trade idea is wrong, I have not touched a stop after placing it.
The one-strategy rule is stated clearly here and I wish I had read it earlier. I tried four different setups in my first month and could not tell which entries worked and which did not. Picked the moving average pullback from Step 5 and tracked it for six weeks straight. Win rate of 57% over 21 trades.
The calendar check before entry is something I had been skipping entirely. After reading Step 6 I started checking the economic calendar for any EUR/USD trade within 24 hours of an ECB or Fed release. Three setups I would have taken last week were on ECB decision day. Stood aside for all three. Two of them reversed sharply within two hours of the release. The third would have been fine but the risk was not worth it given how the others moved.
The 60% win rate threshold before committing real capital is a standard I had never seen stated this clearly in a beginner guide. Most content talks about risk-reward ratios without addressing whether the underlying win rate supports the strategy. I tracked 24 demo trades on the MA pullback setup: 13 wins, 11 losses, 54% win rate. Below threshold. Spent another three weeks refining the entry filter - adding the calendar check and only entering after the 4H candle closes above the EMA. Next 20 trades: 14 wins, 70% win rate. Then went live with $150.
Leave a Review

Forex Analyst & Senior Trader
Former FX desk trader with 8 years in institutional forex. Works in multi-timeframe analysis and order flow, turning desk experience into systematic, testable rules across forex and metals.